Happy Halloween Update!
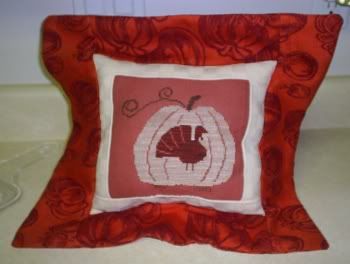
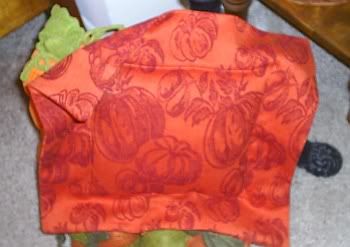
I hope everyone is having a Happy Halloween! I got a lot done this weekend, made two pillows, loaded software onto our new computer and even found time to go shopping. ;) Below are pics of the white pumpkin project that I made into a pillow. This is the first "flanged" pillow I've ever made or a "ravioli" pillow as I like to call them. ;) I think it turned out great, but the outer flanges were a lot bigger than I would like, which makes it a bit floppy. But since I did this w/out a pattern and it's my first attempt I think it's pretty great. :)This is the back of the pillow, I love this fabric. I got it on sale and bought enough so I could use it again next year. :)
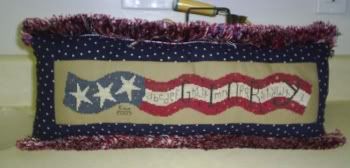
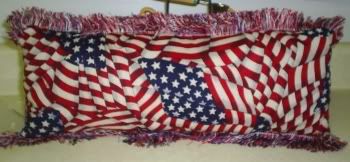
This is the second pillow I made. It has "devil" trim on it, in other words I had a devil of a time with attaching the trim. I had a heck of a time sewing this trim as it was WAY too thick for my sewing maching. But I managed to get it attached and all in all it looks pretty good. This is a project I made for the 4th of July but since I was moving then I never got it finished up. It makes a cute pillow and the "devil" fringe is a nice touch. :)
Here is the back of the pillow, very patriotic! ;) If you want to see larger versions of these pillows, go to my gallery and you can click smaller pics of the pics to see larger versions.
http://institches.zap3x.com/mystitching/2005completed.html
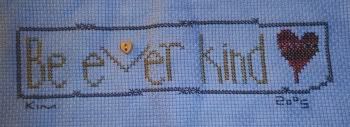
This is a freebie pattern that my LNS lady gave to me I made this as a Xmas gift for someone. It only took a few hours to complete, even w/ the specialty stitches.
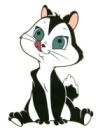
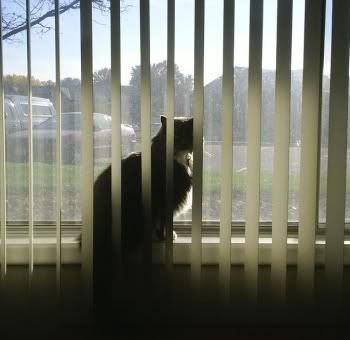
And lastly I leave you with a pic of my "trying to be spooky" cat! Greg took this yesterday, he calls it "Cat Behind Bars" LOL I couldn't believe that Jesse just sat there and let him take her picture, she must've been in a photogenic
mood. ;)
Have a safe and happy Halloween!
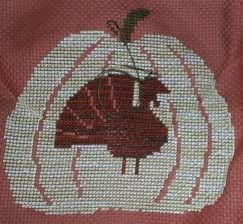
The Great White Pumpkin!
Almost finished! I just have to add the rest of the stem and it's done. I really like how it's turning out. It's supposed to have a constrasting color for the ribs, but I sort of like leaving the fabric showing instead [(whispers) and it saves time] ;)
I would've gotten this done earlier in the week, but my home puter gave up the ghost and it's hard drive went to that great computer heaven in the sky. :D Ironic that it's so close to Halloween when it does this... hmmmmm... Anyhoo, I've spent most of my evenings researching on a replacement and costs, etc. Finally decided to have my brother repair it and get a new laptop for Greg. I'm sure we could've passed on the laptop, but he's been wanting one, so here's a good excuse. ;)
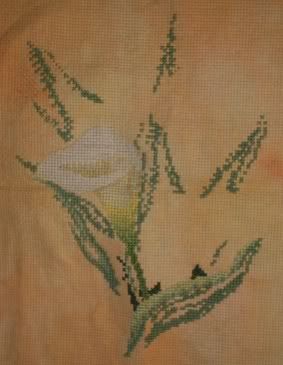
Greg's been working away on his Calla Lilies, and they are starting to look so pretty. We have a frame already picked out for it, it's going to look great. :)
Hope everyone has a fun and safe Halloween weekend!
The Big Move
I decided to switch to Blogger because I have had problems w/ my other blog being deadly slow and sometimes keeping me from posting when I have time. So here is the new spot. The old place will stay up w/ the archives, but I will put all new posts here. If you have followed me here from the old place, THANKS and WELCOME! Greg and I are thrilled that you enjoy seeing our hard work. :)
Additional Flat Fold Info
Ann asked: I have one question on the flat fold. I understand that you glue the cord around the front flap and tie the loose ends with a bow? How do you go for the back flap? Is it the same cord?
The bow is just for added effect, you could trim the cord and glue the ends down if you desired. The cording on the back side is attached in the same manner as the front. I started with a separate piece of cording and glued the end down then wrapped it around the outside edge and glued the other side in place.
One thing I strongly suggest would be to use ribbon between the front and back to keep the project from collapsing. Ribbon is more easily attached w/ glue. I had a devil of a time attching the piece of cording, but I didn't have ribbon, so I improvised. 
I'm glad you all are finding this project explanation helpful, let me know if you have more questions.